
Every great ride starts with a solid setup, and at the heart of your board’s performance are your trucks. They’re more than just metal axles; they define how your board turns, feels, and responds to your every command. Whether you’re assembling a brand-new custom ride or breathing new life into a trusted deck, mastering the art of installing and adjusting your trucks is a rite of passage for every skater.
As a pro skateboarder, I’ll cover the step-by-step installation process, the essential tools for the job, and the subtle art of tuning your trucks for ultimate control. Get ready to build a better connection with your board and take your skating to the next level.
How To Install Skateboard Trucks: 6 Easy & Quick Steps
Whether you’re building a new setup from scratch or replacing a trusty old pair, knowing how to install your skateboard trucks properly is a fundamental skill for any skater. Before you begin, ensure you have all the necessary items. This will make the process smoother and prevent any frustrating interruptions. Here is the step-by-step process:
Step 1: Prepare the Deck
If you have a freshly gripped deck, you’ll need to poke holes through the grip tape for your mounting hardware. From the bottom of the deck, use a bolt or a sharp object to push through the eight mounting holes, creating visible marks on the grip tape side. Then, from the top of the deck, use your blade or the tip of a screwdriver to cleanly puncture the grip tape at each of these eight marks.
Step 2: Insert the Bolts
Push one bolt through each of the eight holes from the top of the deck (the grip tape side). The heads of the bolts should be flush with the grip tape.
Step 3: Orient the Trucks Correctly
This is a crucial step. The kingpins and bushings of your trucks should face inwards, towards each other. The kingpin is the large bolt that holds the bushings (the rubbery rings) in place. When mounted correctly, the two kingpins will be pointing towards the center of the skateboard.
Step 4: Place the Trucks (and Optional Risers)
If you’re using riser pads, place one over the bolts on each end of the deck now. Then, carefully place each truck onto the bolts, ensuring the baseplate holes align perfectly.
Step 5: Hand-Tighten the Nuts
Thread one nut onto each of the bolts. Hand-tighten them as much as you can. This will hold the trucks in place for the next step.
Step 6: Secure the Trucks
Now it’s time to use your tools. Hold the screwdriver or Allen key on the head of the bolt on the grip tape side to keep it from spinning. Use the socket on your skate tool or a separate wrench to tighten the nut.
A good technique is to tighten the nuts in a diagonal or “X” pattern. This ensures even pressure across the baseplate and prevents warping. Tighten each nut until the bolt head is flush with the grip tape and the truck is securely attached to the deck. Be careful not to over-tighten, as this can damage your deck.
Step 7: Final Adjustments
Once both trucks are securely mounted, give them a little wiggle to ensure there’s no movement. You can then attach your wheels and bearings. After your complete skateboard is assembled, you may need to adjust the tightness of the kingpin nut to suit your riding preference. Tighter trucks offer more stability, while looser trucks allow for sharper turns.
And there you have it! Your skateboard trucks are now installed and ready for action. Taking the time to do it correctly will give you a safer and more enjoyable ride.
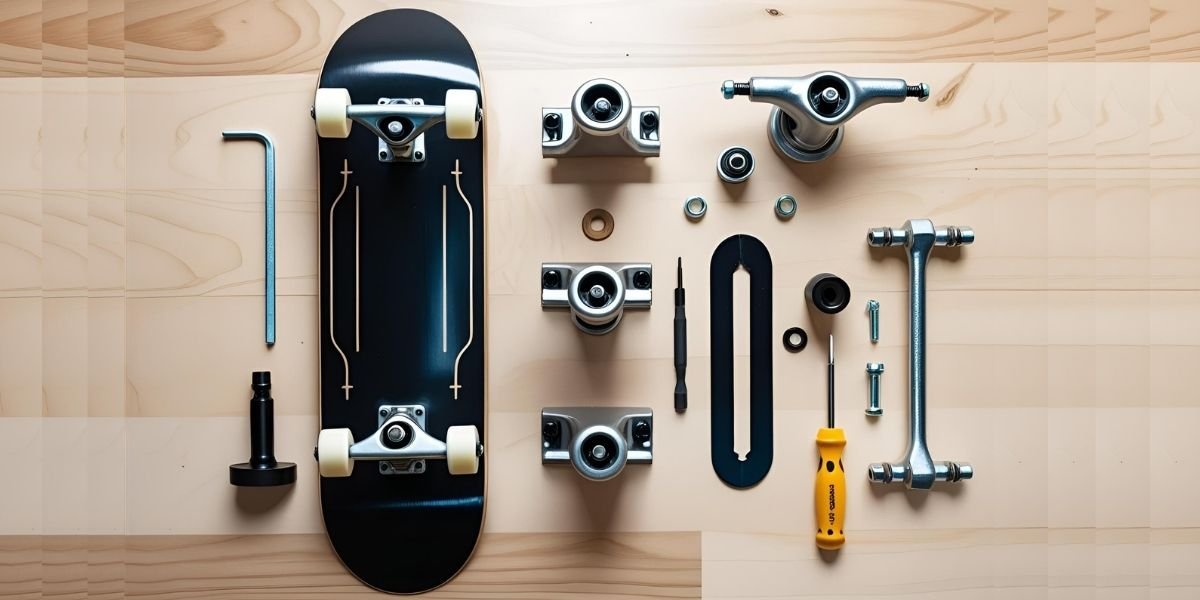
What Tools Do I Need to Install Skateboard Trucks
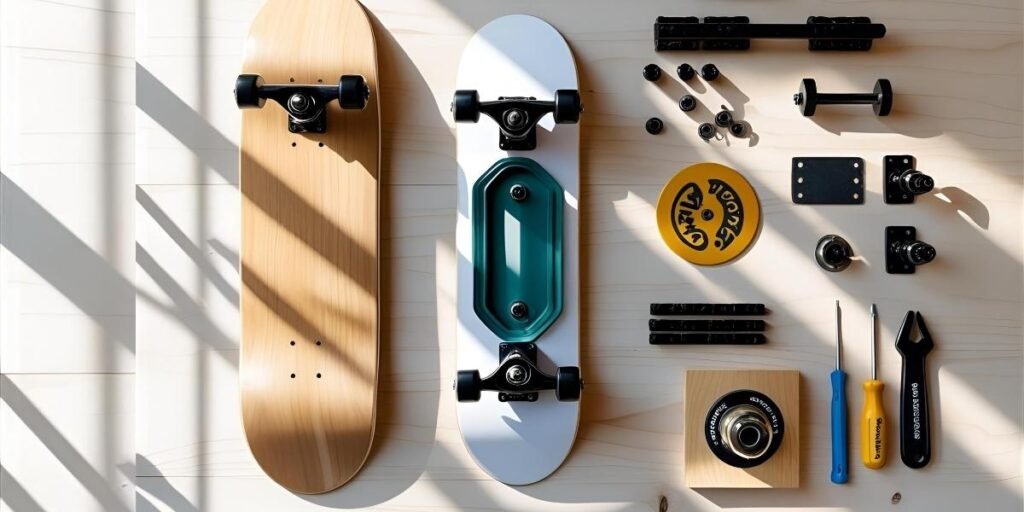
Whether you’re building a brand-new setup or swapping out a well-loved pair of trucks, having the right tools on hand is crucial for a smooth and secure installation. Fortunately, you don’t need a professional workshop to get the job done. A few key items will have you ready to roll in no time.
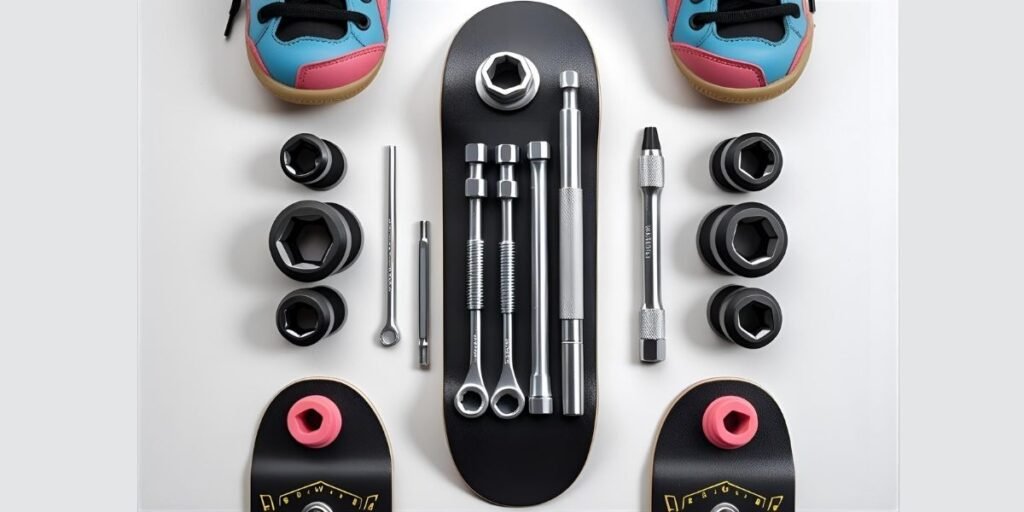
At the top of the list for convenience and efficiency is the skateboard skate tool. This all-in-one gadget is specifically designed for skateboard assembly and maintenance, combining all the necessary components into a single, portable device. A standard skate tool usually includes:
- A 3/8″ socket: This is used to tighten the nuts on the mounting hardware that secures the trucks to the deck.
- A 1/2″ socket: This fits the axle nuts that hold your wheels in place.
- A 9/16″ socket: This is for the kingpin nut, which adjusts the turning tightness of your trucks.
- A Phillips head screwdriver and an Allen key: Most mounting hardware will use either Phillips head bolts or Allen head bolts. A skate tool will usually have both drivers, often as interchangeable L-shaped pieces that fit into the main tool.
If you don’t have a dedicated skate tool, you can assemble a basic toolkit with individual instruments. You will need:
- A 3/8″ wrench or socket for the truck mounting nuts.
- A Phillips head screwdriver or an Allen key, depending on the type of bolts in your hardware pack.
- A 1/2″ wrench or socket for the wheel axle nuts.
- A 9/16″ wrench or socket for the kingpin nut.
While not strictly necessary for the truck installation itself, a sharp blade, like a utility knife or box cutter, is essential if you are also applying new grip tape. This will be used to cleanly trim the edges of the grip tape around the board.
For a truly pro-level setup and maintenance, you might also consider a bearing press/puller. This tool makes installing and removing your bearings from your wheels effortless and reduces the risk of damaging them. However, for a standard truck installation, this is an optional accessory.
In summary, while a few individual tools can get the job done, investing in a quality skate tool is the most recommended and convenient option for any skateboarder. It will not only make the initial installation a breeze but will also be invaluable for any future adjustments and maintenance you’ll need to keep your board riding perfectly.
How To Tighten Skateboard Trucks For Better Control
Tightening your skateboard trucks can drastically improve how your board feels. Loose trucks allow for easier turning. On the other hand, tighter trucks give you stability, but too much of either can throw off your ride. Here’s how to adjust them properly:
1. Flip Your Board: Turn your skateboard upside down so the trucks are facing upwards, providing easy access to the kingpin nut.
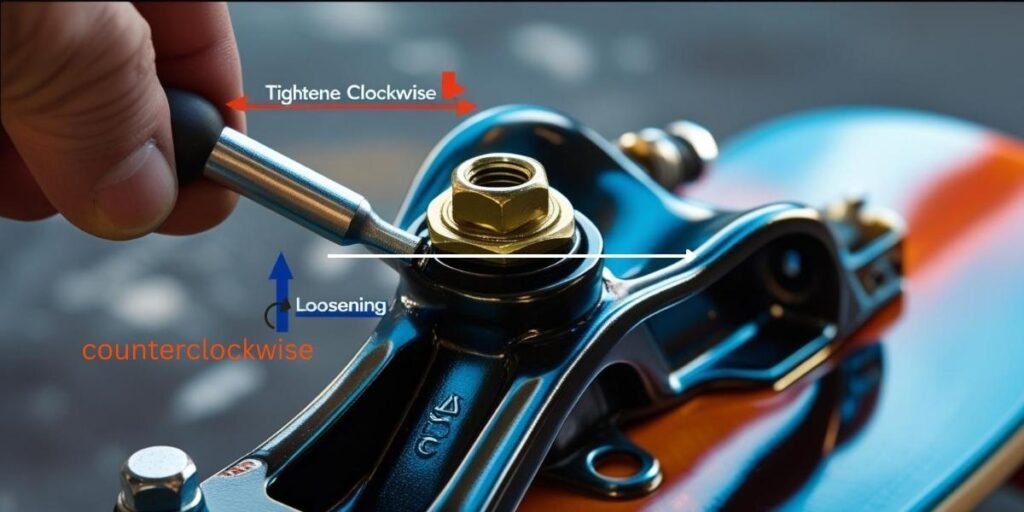
2. Engage the Kingpin Nut: Place your skate tool or socket wrench securely over the large nut in the center of the truck.
3. Tighten in Small Increments: Turn the nut clockwise to tighten the truck. It’s crucial to make small adjustments at a time (a quarter turn is a good starting point). This prevents over-tightening and allows you to feel the change in resistance.
4. Check the Resistance: After each adjustment, use your hands to wiggle the truck from side to side. You should notice an increase in resistance. The goal is to find a balance where the truck is stable but still has some give for turning.
5. Test Ride and Fine-Tune: The ultimate test is to stand on your board and go for a short ride. Pay attention to how the board feels when you lean to turn. If it still feels too loose and wobbly, repeat the tightening process. If it’s too stiff and difficult to turn, loosen the kingpin nut by turning it counter-clockwise.
How to Loosen Skateboard Trucks the Right Way
The process is quick and straightforward, but requires a bit of trial and error to get the perfect feel.
1. Flip Your Board: Place your skateboard upside down on a stable surface, with the wheels and trucks facing up for easy access.
2. Locate the Kingpin Nut: Identify the large nut in the center of each truck. This is the kingpin nut that you will be adjusting.
3. Turn Counter-Clockwise: Fit your skate tool or socket wrench over the kingpin nut. To loosen the truck, turn the nut to the left (counter-clockwise).
4. Make Small Adjustments: It is crucial to make small, incremental adjustments. Start with a quarter-turn at a time on each truck. This allows you to fine-tune the feel without making the trucks dangerously loose all at once. Ensure you loosen both trucks equally to maintain a balanced ride.
5. Test the Feel: After an initial adjustment, use your hands to press down on one side of the deck and feel how easily the truck leans. It should feel noticeably less resistant.
6. Go for a Test Ride: The most important step is to hop on your board and ride it. Pay close attention to how the board responds when you lean into a turn. Is it smooth and fluid? Is it too wobbly?
7. Fine-Tune as Needed: If the ride still feels too stiff, give the nuts another quarter-turn. If you’ve gone too far and the board feels unstable or you experience “speed wobbles” (violent shaking at higher speeds), tighten the nuts slightly by turning them clockwise. Repeat this process until you find your sweet spot.
Can I Install Skateboard Trucks Myself?
Yes, you can install skateboard trucks yourself, and it’s easier than you might think. You don’t need any advanced skills or a full toolbox. You just need a few basic tools like a skate tool or a combination of a socket wrench and screwdriver. Whether you’re building a complete setup from scratch or replacing old trucks, the process is straightforward and can be done at home in less than 20 minutes.
Start by aligning your trucks with the holes on the bottom of your deck, making sure the kingpins face inward toward each other. Insert the bolts from the top of the deck through the baseplate holes, and secure them underneath using your tool. Tighten everything evenly, and double-check that the trucks are firmly in place. As long as you follow a step-by-step approach, you’ll have your board ready to ride in no time.
Doing it yourself not only saves money but also helps you get familiar with your board’s setup, making future maintenance and adjustments much easier. Plus, it’s a great way to build confidence and take ownership of your gear.
How Do I Know If My Trucks Are Too Tight?
If you have to lean way too hard just to make a basic turn, that’s your first clue. Tight trucks limit how much the board can move under your feet. They give you stability, but at the cost of maneuverability. I’ve seen new skaters frustrated because their board felt “dead” and couldn’t carve. The problem? Trucks were cranked down too tightly.
Squeaking noises are another sign: When trucks are overly tight, the bushings get compressed and start to squeak as they fight against movement. I’ve had boards squeal like an old grocery cart just because I over-tightened them after a downhill session. A little loosening and some bushing lube fixed it right up.
Check your wheels too: Uneven wear usually means your trucks aren’t turning properly. If the pressure isn’t distributed evenly, one side of the wheel might start flattening out faster than the other. That can affect both speed and grip.
Installing and adjusting trucks is part of the ride. It’s not just about bolts and nuts. It’s about learning what kind of skater you are. Once you know how to tune your setup, every push, carve, and trick becomes smoother. So yes, do it yourself. You’ll skate better for it.
Best Practices for Adjusting Skateboard Trucks for Tricks
If you want to land tricks cleanly, your trucks need to match your style. The way your board feels when you pop, spin, or catch a grind is shaped by how tight or loose those trucks are. There’s no one setting for everyone, but there are some proven setups that work best for trick-heavy skating.
Tight Trucks Add Control for Flip Tricks
When I’m focused on technical tricks like kickflips or heelflips, I always tighten my trucks a little. It gives the board a snappier response. Tighter trucks help keep your board stable in the air, and they’re more predictable when you land. If your board is too loose, it can wobble or even turn mid-trick, which makes landing way harder. Especially when you’re just learning new tricks, that stability matters a lot.
Loose Trucks Help with Flow and Turn Control
If I’m skating in a park or hitting a street spot with banks, curbs, and lines, I loosen my trucks a bit. Looser trucks help you turn more naturally and flow through tricks. Manuals, wallies, or even quick pivots feel smoother when the board turns easily under you. Just keep in mind, if your trucks are too loose, it can get sketchy on landings. So I go for that perfect middle ground, loose enough to turn, tight enough to stick tricks.
Test and Adjust as You Skate
The best way to dial in your truck’s tightness is to skate and pay attention. Do a few ollies. Try a turn. Ride down a bank. If the board feels twitchy or unstable, tighten it slightly. If it feels stiff and hard to control during turns or grinds, loosen it. I always carry a skate tool in my bag for this reason. It’s normal to tweak your setup depending on where you’re skating that day.
What Size Skateboard Trucks Should I Install?
Getting the right size trucks isn’t just about looks; it’s about balance, turning, and how stable your board feels. Trucks that are too narrow or too wide can throw off your control, even if your tricks are on point.
Your trucks should match the width of your deck as closely as possible. If your deck is 8.0 inches wide, your truck axle should be close to 8.0 inches as well. That gives you a centered, balanced ride. Too narrow, and the board feels twitchy. Too wide, and it feels sluggish and heavy.
I usually ride an 8.25” deck with trucks that have an axle width between 8.0” and 8.25”. That gives me a perfect balance between control and flow for both park and street. If I know I’m hitting a bowl or transition park, I might go up to a wider deck and truck setup for more stability and flow.
Skaters who focus on tight, techy street tricks often go with narrower setups, usually with deck and truck widths around 7.5” to 8.0”. The narrower size makes the board flip faster and feel lighter underfoot. Perfect for ledge tricks, flatground sessions, and learning new flip variations.
If you’re skating on all sorts of terrain, ramps, banks, stairs, rails, something around 8.0” to 8.5” gives you versatility. Wide decks and trucks (8.5” and up) are often used for cruising, bowls, or downhill skating, where control at speed is more important than trick responsiveness.
| Deck Width (inches) | Truck Axle (inches) |
| 7.5″ – 7.75″ | 7.5″ – 7.75″ |
| 8.0″ – 8.125″ | 8.0″ – 8.125″ |
| 8.25″ – 8.5″ | 8.25″ – 8.5″ |
| 8.5″ and up | 8.5″ and up |
Conclusion
Mastering your skateboard setup is a journey, not a destination. And it all begins with the trucks. As we’ve covered, properly installing and adjusting them is more than just a technical task; it’s the first step toward unlocking your board’s true potential and your own. From the simple, satisfying process of bolting them to the deck to the nuanced art of fine-tuning their tightness for the perfect blend of stability and flow, you now have the knowledge to do it all yourself.
Remember, the ideal setup is deeply personal and will evolve as your skills grow. Don’t be afraid to experiment. Carry a skate tool, make small adjustments on the fly, and pay attention to how your board responds. By taking ownership of your gear, you’re not saving money or learning a new skill; you’re building a deeper understanding of what makes your ride unique. Now, get your tools out, dial in your setup, and go skate with the confidence that your board is perfectly tuned for you.
FAQs about Installing Skateboard Trucks
What’s the best way to adjust skateboard trucks for tricks?
For tricks, tighten the trucks a bit for more control. Loosen slightly for better turn flow. Knowing how to tighten or loosen skateboard trucks helps you dial in your setup.
Why do my trucks squeak when I turn?
That squeaking usually comes from dry or over-compressed bushings. A quick fix is to loosen the trucks a bit or add a drop of bushing lubricant. It makes a big difference in how smooth your turns feel.
Do I need washers when mounting trucks?
Yes! Washers help distribute pressure evenly so your deck doesn’t crack or wear around the screw holes. It’s a small part, but it adds long-term durability, especially if you’re landing tricks often.
What happens if I install my trucks backward?
If the kingpins face outward, your board will feel unstable and hard to control. Always make sure both kingpins face each other toward the center of the deck. It’s a tiny detail that makes a huge difference.
Can I use a regular wrench instead of a skate tool?
Sure, but a skate tool makes it faster and easier. It’s designed for all parts of your board, so you won’t have to fumble around. If you’re building or adjusting often, it’s worth having one.
How often should I check or adjust my trucks?
Check them regularly, especially if the board feels different or after hard landings. A quick turn of the kingpin nut can bring back the control and comfort you’re used to. Trust your feet, they’ll let you know.
How to put trucks on a skateboard step-by-step?
Place the trucks under the deck with kingpins facing inward. Line up the baseplate holes with the deck’s holes. Insert screws from the top, add washers, then tighten nuts in a crisscross pattern using a skate tool or wrench. Check alignment and test ride.
What is the correct direction for skateboard trucks?
The kingpins, the big bolts in the middle of each truck, should face each other toward the center of the skateboard deck. This inward direction ensures your board turns smoothly and rides stably. Outward-facing kingpins cause awkward handling.