
Grip tape is the unsung hero of every skateboard. It’s that rough, gritty surface that keeps your feet glued to the board when you need it most. Whether you’re bombing a hill, locking into a frontside boardslide, or learning your first ollie, grip tape gives you the control to make it happen. It’s not just there to look tough. It’s what lets you trust your board with every push, flick, and landing. Without grip, skateboarding would feel like skating on ice. This little sheet of grit is what connects your shoes to your style and keeps you rolling with confidence.
Think of it as the foundation of your ride. Whether you’re cruising around town, learning your first trick, or hitting rails at the skatepark, grip tape is working silently under your feet. If your board is your canvas, grip tape is what lets you paint with precision.
Stick around! In the next few moments, you’re about to get more than just a guide. You’ll learn exactly how grip tape works, how to apply it step by step, how to keep it clean, and when it’s time for a fresh sheet. We’ll also cover custom styles, top brands, costs, and everything you need to know about skateboard grip tape.
What is Skateboard Grip Tape?
Grip tape is that rough, gritty sheet you stick on the top of your board. But it’s not just sandpaper on a sticker. It’s what gives you the traction to snap ollies, catch flips, and ride with confidence.
It’s built to lock in your shoes. Whether you’re carving, pushing, or mid-trick, grip tape keeps your feet planted so your board stays with you. It also adds personality. Custom designs and graphics let you show off your style every time you skate.
Skateboard Grip Tape Is the Key to Total Board Control. Grip tape keeps your feet glued to the deck. That’s the bottom line. If you’ve ever landed a trick clean or stayed locked in while bombing a hill, thank your grip tape. Without it, your shoes would slide all over the place and your board would feel like ice. No grip means no control. No tricks. No confidence.
If you’re serious about skating, you need to understand your grip tape inside and out. This guide breaks it all down from the basics to the pro-level details most people overlook.
The History of Skateboard Grip Tape
Skateboard grip tape has come a long way from its humble beginnings as a safety feature to a key component of skateboard culture.
In the 1960s, skateboarding grew in popularity, and skaters needed better traction to perform tricks. Early grip tape was essentially sandpaper, applied to the top of the deck for improved grip. This simple solution helped prevent feet from slipping off during tricks and rides.
In the 1970s, brands like Jessup and Mob Grip introduced higher-quality materials like aluminum oxide, which were more durable and provided better grip. By the 1980s, grip tape also became a way for skaters to express their style, with custom designs and graphics. Today, grip tape comes in various designs, including clear and colored versions, while maintaining its essential function of providing traction for skaters.
Grip tape has evolved to offer both performance and personal expression, making it a staple in skateboarding culture.
Types of Grip Tape for Skateboards
There are several different types of grip tape available today, and each brings something unique to your setup.
Standard Black Grip Tape
This is the classic choice for most skaters. It has a rough, gritty texture that offers solid traction and long-lasting performance. If you’re just starting or want a clean, functional setup, the standard black grip does the job well. It’s simple, reliable, and trusted by skaters of all levels for good reason.
Clear Grip Tape
Clear grip tape is perfect if you want to let your deck’s graphics shine through. It offers the same grippy texture as black tape but with a transparent finish that doesn’t hide the artwork underneath. This type is ideal for those who care about visuals just as much as performance and want their board’s personality to stand out.
Graphic or Printed Grip Tape
Printed grip tape lets you express yourself every time you ride. From logos and slogans to vibrant artwork, this style turns your board into a moving piece of art. Some brands offer custom printing, so your grip tape can truly reflect your style. It’s bold, fun, and gets you noticed at the park.
Perforated Grip Tape
Perforated grip tape includes tiny holes throughout the sheet that allow air to escape during application. That means fewer bubbles, cleaner edges, and an easier setup overall. It’s especially great for beginners who want a hassle-free experience or for anyone doing their board without professional tools.
Materials That Make a Difference
The materials used in grip tape aren’t random. They’re specifically chosen for their strength, durability, and performance. Most high-quality grip tapes are made with either silicon carbide or aluminum oxide. These industrial-grade abrasives are designed to last through the wear and tear of skating; daily flips, slides, and grinds don’t wear them out easily. These materials are tough, which is exactly what you want when your grip is being tested every session. The backing on grip tape is just as important.
It uses a pressure-sensitive adhesive that forms a tight, lasting bond with the wooden surface of your deck. This adhesive needs to withstand heat, cold, moisture, and constant impact. Cheap grip tends to peel at the edges after a few weeks, but premium tape stays down and keeps its hold for months. You might not think much about what goes into a sheet of grip, but once you’ve skated on good material, you won’t want to go back. It makes every push smoother and every landing more secure.
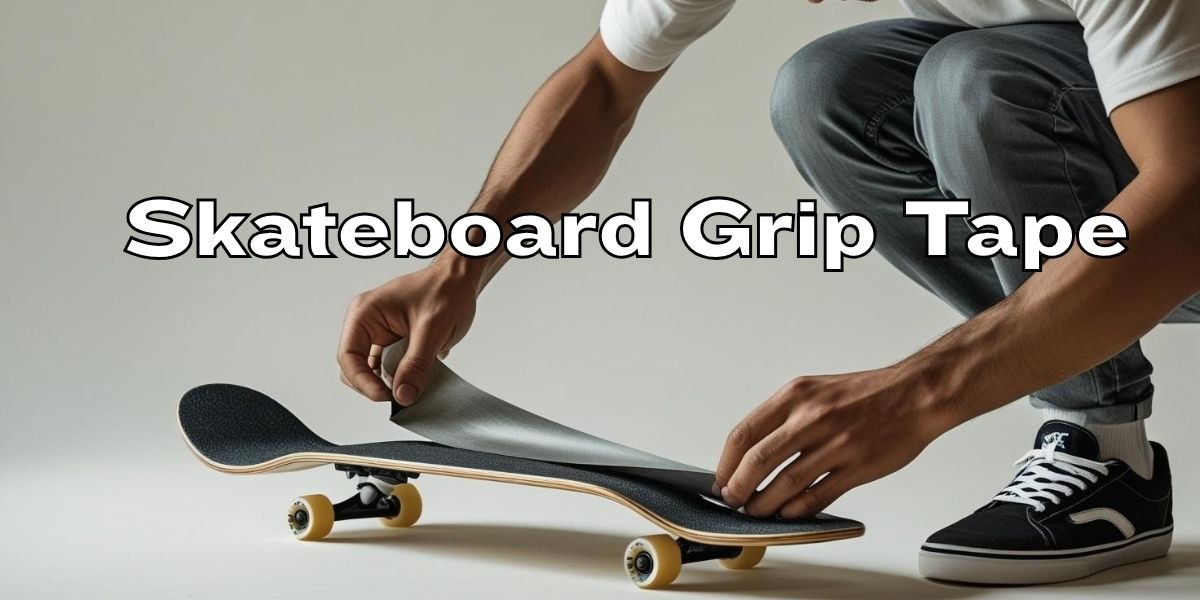
How to Apply Grip Tape to a Skateboard
To apply grip tape, clean your deck, stick the tape on carefully, then trim the edges for a smooth finish. If you’re ready to upgrade your skateboard’s grip, applying new grip tape is a simple process that can make a world of difference. Here’s a step-by-step guide to help you apply grip tape correctly:

Step 1: Clean the Deck
Start with a clean surface. Wipe off any dust, dirt, or leftover grip with a damp cloth. Let it dry fully before you move on. If the board isn’t clean, the tape won’t stick well and may peel off later.
Step 2: Line Up the Grip Tape
Take your grip tape and lay it over the board without peeling it yet. Make sure it covers the whole surface. It’s okay if it hangs over the edges a little. That extra bit will help you get a cleaner cut later.
Step 3: Peel and Stick Slowly
Now peel off the backing paper. Start at one end of the deck and slowly press the grip tape down as you go. Use your palm or a flat object to smooth it out. Go slow and steady. This helps avoid annoying air bubbles.
Step 4: Press and Shape the Edges
Once the tape is on, run something hard (like a screwdriver or metal file) along the edge of the deck. This will make a white outline where you’ll cut. It also helps press the tape firmly onto the curves.
Step 5: Trim the Edges
Use a sharp razor or utility knife to cut along that outline. Keep the blade close to the edge and go slow. Clean cuts look better and won’t peel up as fast.
Step 6: Poke Holes for the Bolts
If the tape covers your bolt holes, use a small tool to poke through them from the top. You can use the bolts themselves, a nail, or a screwdriver.
Step 7: Smooth Out Any Bubbles
If you see air bubbles, press them out with your fingers or pop them with the tip of your blade and press them flat. A smooth surface gives you a better grip and looks cleaner.
Once you’re done, your board is ready to ride. It might feel rough at first, but that’s the grip doing its job. You’ve got full control under your feet.
Can You Ride a Skateboard Without Grip Tape?
Yes, you can ride a skateboard without grip tape but I wouldn’t recommend it unless you’re just messing around on carpet or filming something funny. Grip tape is what keeps your feet locked in. Without it, you’re slipping all over the place.
I remember trying it once when I was younger. My grip was worn out, and I was too impatient to wait for a new sheet. I figured I’d just cruise to the corner store. Big mistake. The first turn I made, my front foot slid right off the board. I ended up on the pavement with a scraped elbow and a bruised ego.
Grip tape gives you control. Whether you’re popping an ollie, sliding into a manual, or just carving around the block, that gritty surface keeps your shoes stuck to the deck. Without it, even simple moves feel sketchy.
So yeah, technically you can ride without grip tape. But if you actually want to skate, do yourself a favor and make sure that grip is solid. It’s not just about tricks. It’s about staying safe and having fun without worrying about slipping off every two seconds.
How Long Does Skateboard Grip Tape Last?
Grip tape usually lasts about 6 months to a year, but that depends on how hard you skate. If you’re out there every day landing tricks, sliding your shoes around, and hitting ledges, your grip might start wearing down in just a few months.
One summer, when I was skating every single day. I was practicing tre flips nonstop and doing a ton of ledge work. After about two months, the grip on my front foot spot was completely smooth. It looked like sandpaper that had been used on a car. My flicks started slipping, and I knew it was time for a fresh sheet.
The first thing you’ll notice is the grip losing its rough texture. It might start to feel a little slick when you try to set up for tricks. Sometimes the edges start peeling or cracking, especially if your board gets wet or you’ve been skating in the rain. Faded patches and smooth spots are signs it’s time to swap it out.
Good grip is everything. It keeps your feet in place, helps you stay in control, and gives you that satisfying feel when you pop or flick. So if your tape starts feeling weak or worn, don’t wait too long. Fresh grip makes a big difference. Trust me, your tricks (and your shoes) will thank you.
How to Clean Grip Tape on a Skateboard
To clean your skateboard grip tape, gently scrub it with a wire brush or use a grip cleaner to remove dirt and grime without damaging the surface. Clean grip means better control and a longer life for your board.
Step 1: Try a Wire Brush
This is my go-to. Use a soft wire brush and gently scrub back and forth. Don’t go too hard or you’ll wear down the grip. Focus on spots that look caked with dirt. You’ll be surprised how much comes off with just a few strokes.
Step 2: Use Grip Cleaner
There are cleaners made just for grip tape. I’ve used them when my board gets really dirty from skating dusty parks. Just spray it on, let it sit for a few seconds, then wipe it with a clean cloth. It’s quick and works well without messing up the grip.
Step 3: Use Water Carefully
If you don’t have a brush or cleaner, you can use a little water. Lightly dampen a sponge or cloth and scrub gently. Don’t soak it. Water can loosen the adhesive if it gets under the tape. Always dry it off with a towel right after.
Keep It Fresh
Cleaning your grip tape once in a while keeps your board looking and feeling fresh. It also helps your shoes last longer since they don’t rub against all that gunk. For me, it’s part of the routine now like tightening bolts or swapping bearings. Clean grip means clean tricks.
Why Clean Grip Tape Matters
Dirty grip tape doesn’t just look bad. It stops working the way it should. Over time, dust, dirt, and even bits of your shoes can build up on the surface. That gritty feel starts to fade, and tricks become harder to land. Your feet might even slip during basic turns.
I used to ignore cleaning mine until one day I went for a kickflip and totally missed the flick. The board shot out, and I landed hard. When I checked, my grip was slick with months of grime. That’s when I learned keeping your grip clean is part of staying in control.
How to Remove Grip Tape from a Skateboard
To remove grip tape, heat it up with a hairdryer, then peel it off slowly and clean the deck afterward. It takes a bit of patience, but it’s doable.
Warm It Up
Use a hairdryer and slowly move it back and forth across the deck for a couple of minutes. Focus on one end of the board. The heat softens the adhesive underneath and makes it way easier to peel. Trust me, if you try to rip it off cold, you’ll fight with it for hours and probably tear the tape to bits.
Start Peeling
Once it’s warm, slide a razor blade or box cutter under one edge. Be careful with your hands. Take your time and start pulling. Keep heating as you go if it starts to resist. The goal is to get the whole sheet off in one go. It’s super satisfying when it comes off clean.
Clean Off the Leftovers
After the grip is off, you might see some sticky residue on the deck. I usually grab a bit of rubbing alcohol or grip tape remover and scrub it gently. You don’t need to go too hard. Just get the surface smooth and ready for the new grip.
Removing grip is part of the process. It’s like wiping the slate clean before setting up something fresh. The first time I did it, I rushed and tore the tape into pieces. Now, it’s a chill part of my setup routine. With a little patience and the right tools, you’ll have your deck prepped and ready to grip like a pro.
Why You Might Need to Remove Grip
Over time, grip tape wears out. It can get smooth, peel at the edges, or just stop giving you the control you need. When that happens, it’s time for a fresh sheet. I’ve swapped grip more times than I can count. Sometimes to refresh my setup, sometimes to change the style. Either way, removing the old one is the first step.
How to Trim Grip Tape for a Perfect Fit
To get a perfect trim, apply your grip tape with a little overhang, then carefully cut along the deck with a sharp blade. A clean edge makes your board look better and skate better.
Step 1: Press It Down and Leave a Bit Hanging
Once you’ve laid the grip tape down, don’t start cutting right away. Press it firmly onto the deck and let it hang a little over the edges. That slight overhang gives you better control when it’s time to cut. You don’t want to be fighting the tape mid-slice.
Step 2: Create a Guide with a File
Before you grab the blade, use something like a metal file or even a screwdriver. Rub it around the edge of the board to create a solid outline. This presses the tape into the shape of your deck and makes cutting much smoother. The first time someone showed me this trick, it was a game-changer. My cuts went from sketchy to pro-level overnight.
Step 3: Cut Slow with a Sharp Blade
Use a brand new razor or a sharp utility knife. Start at one end and follow the outline you just made. Keep the blade steady and tilted a bit toward the deck. Take your time. I always cut a few inches at a time instead of going all the way around in one go. It helps avoid slips and keeps the line smooth. Rushing it almost always leads to regret and a janky edge.
The first board I ever set up by myself? I hacked the grip so bad it looked like a five-year-old did it. I still rode it, but man, I cringed every time I looked down. These days, trimming the grip is one of my favorite parts of the setup. It’s quiet, focused, and super satisfying. When that last piece of excess tape drops to the floor, you know your board’s ready to rip.
How to Test The Grip Of Skateboard Grip Tape
The best way to know if your grip tape is doing its job is to test how well it holds your feet in place. Grip tape should feel rough, firm, and reliable under pressure. If it doesn’t, it’s time to take a closer look.

First, just look at the tape. You want that gritty, sandpaper-like texture to be consistent across the surface. If it looks worn down, smooth in spots, or faded, it might be losing grip. I once ignored a worn-out patch on my tail and slipped mid-tre flip. That moment taught me to trust what I see.
Next, run your fingers across the grip. It should feel rough, like it’s grabbing your skin. If it feels soft or slick, that grip won’t cut it. A good tape grabs your shoes the same way. I always do a quick “foot check” by standing on my board and shifting my weight. If my feet slide even a little, I know it’s time to replace it.
And the real test? Just ride. Pop a few ollies, flick a kickflip, cruise around. If your feet stay locked in and you feel stable, your grip is solid. If not, it could be holding you back without you even realizing it. I’ve had a grip that looked okay but felt off during tricks. The second I swapped it for a fresh sheet, everything felt tighter, smoother, and more controlled. Never underestimate what a proper grip can do for your skating.
What Are The Best Grip Tape Brands?
The best grip tape brands are the ones that give you solid traction, hold up to abuse, and match your style of skating. Over the years, I’ve tried almost everything out there. Some grip wears out too fast. Some feel too slick right out of the package. But a few brands always stand out.

3M Grip Tape
If you’re after pure durability, 3M delivers. It’s not the flashiest, but it sticks forever and keeps its grip even after months of heavy sessions. I once used 3M on a setup I took on a road trip. Skated it through dirt, rain, and rough spots, and it never peeled or lost its bite. It just held up.
Jessup Grip Tape
Jessup is classic. It’s been around forever, and there’s a reason skaters keep going back to it. It goes on smoothly, cuts clean, and doesn’t shred your shoes too fast. I used Jessup through my early years when I was learning flip tricks. It gave me enough grip without feeling like sandpaper against my shoes. Perfect balance.
Mob Grip
Mob is what I ride most these days. It’s super grippy, almost sticky. If you’re into technical tricks, Mob gives you that locked-in feel. I like how it doesn’t wear down quickly, even after weeks of hard skating. I remember skating a ledge line over and over, and the grip still felt fresh by the end of the week. That says a lot.
Black Diamond
Black Diamond is solid and affordable. Plus, they drop some wild designs if you want something that stands out. I’ve used it a few times when I wanted a bit more personality on my setup without sacrificing performance. It’s grippy and holds up well. Great if you want something budget-friendly that doesn’t feel cheap.
Shake Junt
If you’re looking for style and serious grip, Shake Junt brings both. Their graphics are bold, and the grip is no joke. I remember setting up a Shake Junt deck right before a local contest. The grip held through every run, and yeah, I felt just a little cooler riding it. Sometimes vibe matters too.
How Much Does Skateboard Grip Tape Cost?
Skateboard grip tape usually costs between $5 and $15, depending on the brand and design. Basic grip tape from brands like Jessup or Black Diamond typically falls on the lower end, around five to seven dollars. These options are great if you’re just getting started or want something simple that gets the job done. I used Jessup a lot when I first started skating every day, and it always held up just fine for learning tricks and cruising around.
If you’re looking for something with a little more grip and durability, premium brands like Mob or 3M are worth the extra cost. These usually range from about $8 to $15, and they’re what I go for when I need something that grips hard and holds up during heavy street sessions. I remember switching to Mob Grip during a summer of skating every day, and the difference was real. It gave me way more control during flick tricks, and it didn’t wear down nearly as fast.
Custom grip tape with color, patterns, or logos can push the price even higher. I once splurged on a Shake Junt grip with bold yellow lettering. It cost more than I usually spend, but it added personality to my setup and stood out at the park. Just keep in mind, if you’re ordering online, shipping costs can add up fast. A $7 sheet can easily turn into $12 once you check out. I usually grab a few sheets at once to save on shipping and keep extras for future setups.
Differences Between High-End and Budget Grip Tape
High-end grip tape gives you better grip, more durability, and a smoother ride. Budget options work fine for cruising but may wear out faster or feel uneven under your feet.
Performance and Feel: Premium grip like Mob or 3M locks your feet in during tricks. The texture is even and strong. I’ve skated budget grip before, and while it held up for mellow rides, it didn’t give me the control I needed for flip tricks or ledge sessions.
Durability Matters: High-end grip lasts longer. The adhesive sticks better, and it doesn’t peel after a few weeks. I once bought a cheap sheet to save money, and it started lifting around the tail in just a few sessions. Since then, I stick with a grip that stays solid.
When to Go Budget: If you’re new to skating or just cruising, a budget grip can get you started. But if you’re skating hard or learning tricks, high-end grip is worth the extra few bucks. It’s a small upgrade that makes a big difference in how your board feels under your feet.
How To Choose The Best Grip Tape
To choose the best grip tape, think about your skate style, how much grip you need, and how often you skate. The right tape should feel good under your feet, hold up to wear, and match your personal vibe.
Know Your Skating Style
If you’re into technical tricks and flip-heavy skating, go for something extra grippy like Mob. That tacky feel helps your shoes stick when you’re popping, flicking, and catching. But if you’re more of a cruiser or you skate transition, something with a slightly smoother feel like Jessup, might be better. It gives you control without shredding your shoes too fast.
Consider Grip Strength
Not all grip tape feels the same. Some brands are super gritty, while others feel more mellow. I’ve had setups where the grip was so rough it tore through my shoes in a week. On the flip side, I’ve also had tape that felt too soft and made tricks feel slippery. You want something that gives you confidence, not frustration. Try different textures if you’re not sure what feels best yet.
Think About Durability
If you skate often, pick a brand known for long-lasting grip. There’s nothing worse than setting up a fresh deck only to have the grip start peeling or smoothing out in a few sessions. I’ve found Mob and 3M last the longest, especially in rough weather or heavy use.
Check for a Clean Application
Some grip tape brands are easier to work with than others. Jessup, for example, goes on smoothly and cuts easily, which is great if you’re setting up your board yourself. A clean application means fewer air bubbles, smoother edges, and a longer-lasting hold.
Look for Personal Style
Grip tape isn’t just functional. It’s part of your board’s look. Whether you want something plain and clean, bold with graphics, or even custom-cut, there’s a grip tape out there that fits your style. I’ve had setups where the grip made the whole board pop, just from a little color or logo.
Try not to overthink it. The best grip tape is the one that helps you feel connected to your board. If it lets you skate the way you want and holds up over time, you’re good. Everyone has their favorite, and you’ll figure out yours as you skate more.
Can You Paint Skateboard Grip Tape?
Yes, you can paint your grip tape, but you have to be careful if you want to keep your board grippy and ride-ready. Painting grip tape is a cool way to make your setup stand out, but it takes some patience and the right approach.

Choosing the Right Paint: From my experience, fabric or acrylic paints work best. They stick well to the rough surface without peeling off too fast. I’ve also tried spray paint for quick coverage, but it can be tricky to control and might clog up the grip if you’re not careful.
Go Easy on the Layers: When I first tried painting my grip tape, I got a bit carried away with thick layers. Big mistake. The grip got slick, and I almost wiped out because my feet weren’t sticking like usual. Now I always apply thin layers, letting each dry before adding the next. It keeps the texture intact and still looks fresh.
Expect Some Grip Changes: Keep in mind, painting grip tape can soften its texture just a little. If you go heavy, you’ll lose traction. But with a light touch, your board will still hold your feet well. The trick is balancing your style with your safety.
Make It Your Own: Painting your grip tape is a great way to add your personality to your board. I once used stencils and tape to create a graphic that got me compliments at the skatepark for weeks. It makes your board feel like a true extension of yourself.
If you want to try it, just remember: take your time, use the right paint, and keep the grip strong. That way, you skate safely and look good doing it.
How to Customize Skateboard Grip Tape
Customizing your grip tape is a great way to make your board truly yours. It lets you stand out while still keeping the grip you need to shred. I’ve been tweaking my boards for years, and it’s always a fun part of the setup process.
Cutting Shapes into the Grip Tape
One of my favorite ways to personalize grip tape is by cutting shapes or patterns right into it. After you apply the tape, use a sharp blade to carefully cut out logos, symbols, or even cool geometric designs. I once cut out a lightning bolt on my board. It gave me a little extra style without messing with the grip. It takes patience, but the results look sick.
Adding Stickers and Graphics
Stickers are a quick and easy way to add personality. Some skaters put stickers under the grip tape so the design peeks through like a secret message. Others slap stickers right on top for a bold look. I remember one time I covered my board with band stickers on top of the grip. It wasn’t the most durable, but it turned heads at the park.
Painting Your Grip Tape
Painting your grip tape lets you get creative with colors and patterns. I like to use stencils and thin layers of acrylic paint so the grip stays strong. It’s a bit of a balancing act, but when you get it right, the result is a board that’s both fresh and functional.
Trying Colored Grip Tape
If you want something simpler, colored grip tape is an easy way to switch up the look. These come in tons of colors and can give your board a clean, vibrant vibe right out of the pack. I once rolled with a bright red sheet that made my board impossible to miss.
Keep It Functional
The most important thing to remember is not to sacrifice grip for style. I’ve seen boards with crazy custom designs that looked cool but felt slick and unsafe to ride. Grip tape’s job is to keep your feet planted, so don’t go too heavy on paint or cut away too much surface.
Customizing your grip tape is a fun way to express yourself. Take your time, get creative, and make sure your board feels just as good as it looks. That way, you’ll skate confidently and look fresh every session.
How To Maintain Skateboard Grip Tape
To keep your grip tape performing at its best, you need to maintain it regularly. A clean, solid grip means better control and longer life for your board. It doesn’t take much, just a little care here and there goes a long way.
I always brush my grip down after long sessions, especially if I’ve been skating in dusty parks or crusty street spots. A wire brush or grip cleaner can clear off dirt and keep that gritty feel sharp. The more buildup you let sit, the quicker your grip starts to fade. I’ve had boards where the grip looked fine but felt slick because I let it get caked with grime. Trust me, just a quick clean makes a difference.
Try to avoid skating in the rain or through puddles. Water weakens the adhesive and can make your grip slippery and soft. I once got caught in a downpour mid-session and didn’t think much of it until my grip started peeling a few days later. If the edges do start lifting, trim them before they get worse. Eventually, no matter how well you care for it, grip tape wears out. Once it loses that rough texture or starts feeling dull under your shoes, it’s time to swap it. Fresh grip doesn’t just look better. It gives you the control you need to skate with confidence.
Environmental Impact Of Skateboard Grip Tape
Skateboard grip tape isn’t just about function. It also leaves an impact on the planet. Most grip tape is made from synthetic materials that don’t break down over time. Once it’s tossed, it usually ends up sitting in landfills for years.
The Waste Problem
Traditional grip tape is made with things like aluminum oxide and silicon carbide. These materials are tough, which makes them great for skating but not great for the earth. I used to go through a new grip every few weeks during heavy sessions, and I never really thought about where all those scraps ended up. Now, it hits a little different knowing they’ll be sitting in a landfill longer than I’ll be skating.
Are There Greener Options?
Thankfully, more brands are starting to care. Some are making grip from cork or using biodegradable glues. It’s not super common yet, but it’s a step in the right direction. I tried a sheet of eco-grip a while back. It didn’t feel as gritty as Mob, but it held up surprisingly well and made me feel better about what I was putting on my board.
Recycling and Reuse
Grip tape is difficult to recycle in the usual manner due to its materials and adhesives. There aren’t big programs for grip recycling yet, but you can still do your part. Clean your tape often to extend its life. Don’t toss it the second it starts fading. I’ve gotten extra months out of grip just by brushing it clean and trimming worn edges.
Support Sustainable Brands
If this stuff matters to you, look for brands that are trying to be more eco-friendly. Some companies are experimenting with sustainable manufacturing and materials. It’s not just about what’s grippiest anymore. It’s about who’s thinking ahead. As skaters, we’re always in the streets and connected to our environment. So riding with a little more awareness just makes sense.
My Final Thoughts
Grip tape may seem like a minor part of your setup, but it plays a significant role in how you ride. From choosing the right brand to customizing it with your style, good grip tape gives you confidence and control every time you step on your board.
I’ve skated everything from cheap sheets that peeled in a week to premium grip that held strong through months of heavy sessions. Trust me, the difference is real. Whether you’re cruising your local streets or working on your next trick, having a solid, clean grip under your feet makes all the difference.
So take the time to pick what works best for you. Keep it clean, replace it when it wears down, and don’t be afraid to add a personal touch. Grip tape is more than just sandpaper on wood. It’s part of your ride, your style, and your connection to the board.
FAQs about Grip Tape for Skateboards
What is grip tape used for?
Grip tape keeps your feet locked to the board. It gives you the traction you need for control, balance, and tricks. Without it, skating becomes way harder and less safe.
How does skateboard grip tape work?
Grip tape works like sandpaper. It sticks to the deck and creates friction with your shoes so your feet stay in place while riding, turning, or doing tricks.
What is the best skateboard grip tape brand?
Mob Grip is the top choice for many skaters. It’s super grippy, long-lasting, and handles rough skating well. Jessup and 3M are also solid picks.
What is the best grip tape for a skateboard?
If you’re doing tricks, go with Mob or 3M for max grip. For cruising or mellow rides, Jessup or Black Diamond gives a smooth, reliable feel.
Where can I buy grip tape for skateboards?
You can find grip tape online at skate shops, Amazon, or sites like CCS and Zumiez. Local skate shops usually have a few great options too.
Can you paint skateboard grip tape?
Yes, but use light layers and the right paint. I’ve used acrylics with stencils and it worked great without messing up the grip.
How to customize skateboard grip tape?
You can cut shapes, add stickers, use colored sheets, or paint it. Just don’t overdo it or you’ll lose grip where it matters most.
How much does skateboard grip tape cost?
Most grip tape costs between $5 and $15. Basic brands are cheaper. Premium or custom designs cost more but usually last longer.
How to maintain skateboard grip tape?
Brush off dirt, avoid water, and trim peeling edges. A little care goes a long way. I clean mine often to keep the grip feeling fresh.
What is the best skateboard grip tape for tricks?
Mob Grip and 3M hold up best for flip tricks and hard skating. They grip strongly and don’t wear out fast, even after heavy sessions.