
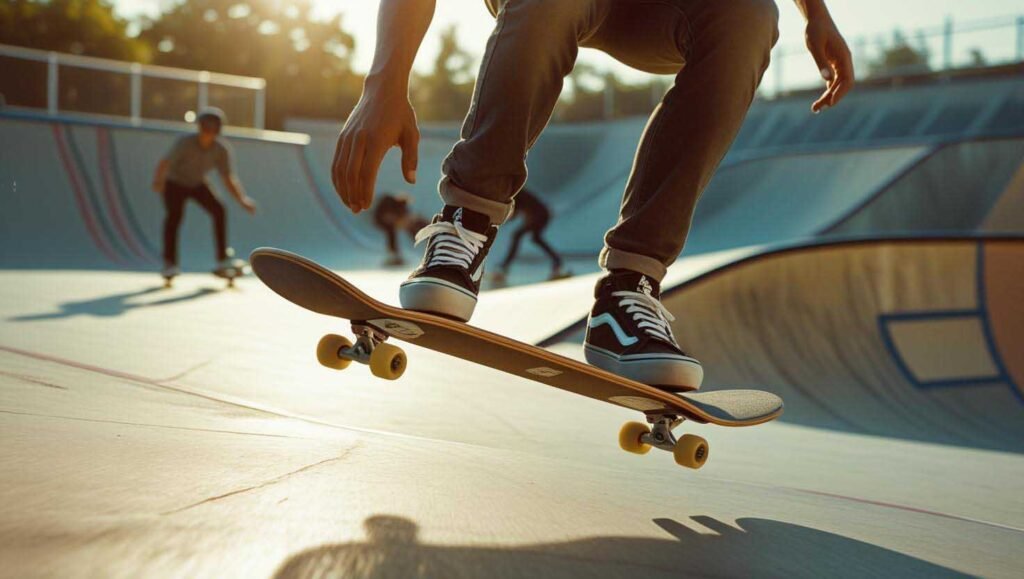
Want to make your skateboard jump with you? That’s what an ollie does, and it’s the trick that opens the door to everything else in street skating.
To ollie, you pop the tail of your board down with your back foot while sliding your front foot up the deck. This motion lifts the board into the air without using your hands. With enough practice, your board sticks with you as you jump.
Sounds simple, right? But the ollie is one of those moves that takes patience. At first, it feels awkward. Your timing’s off, the board doesn’t cooperate, and it might feel like you’re getting nowhere. Don’t stress, every skater goes through it. The good news? Once it clicks, it sticks.
This guide breaks it down step-by-step. You’ll learn the proper foot placement, what to expect in the first few weeks, how to avoid common mistakes, and what to do when you get stuck. Whether it’s your first day riding or your first real trick attempt, this is where it all begins.
Let’s learn how to ollie on a skateboard and make the most of it.
What Is an Ollie in Skateboarding?
An ollie is a jump where the skateboard sticks to your feet without using your hands. It’s one of the first real tricks most skaters learn and the key to unlocking the rest of your skate journey.
Why the Ollie Matters
The ollie is the gateway to almost every street skating trick. Kickflips, heelflips, 180s, grinds, stair sets, they all begin with a solid ollie. If you want to ride up a curb or land your first trick, learning how to ollie is a must.
What Happens During an Ollie
First, you pop the tail of your board down hard with your back foot. Next, your front foot slides up the board. That movement helps the board rise and stay level in the air. Finally, you land with both feet on the board, ready to roll away clean.
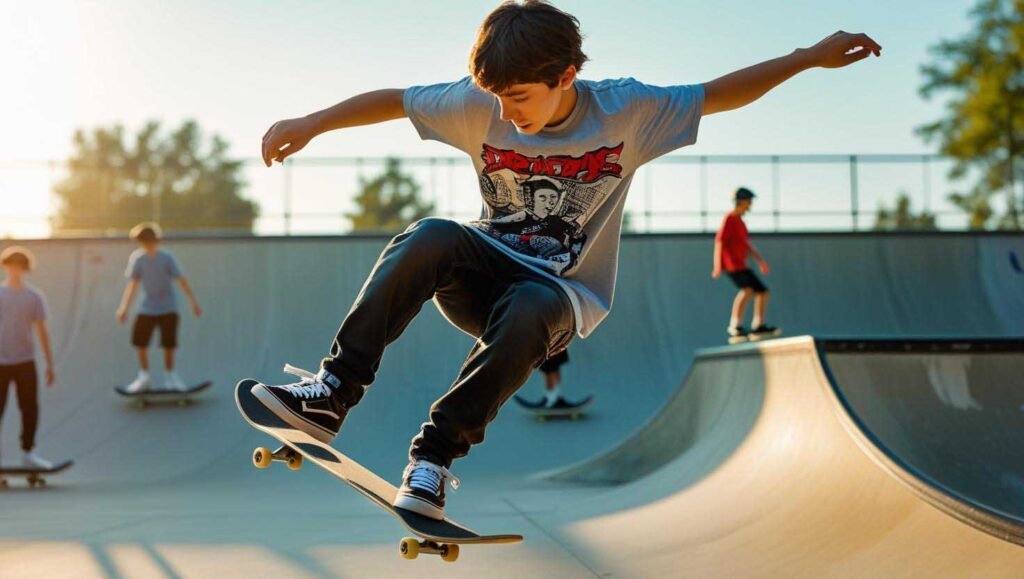
It Looks Easy, But Every Skater Struggles at First. When pros ollie, it looks smooth and effortless. But behind that flow are hours of practice, bruises, and failed attempts. Every skater starts with awkward jumps and sketchy landings. That’s normal. The key is to keep trying.
If you stick with it, the ollie will click and once it does, the rest of skateboarding opens up.
Is Learning to Ollie on a Skateboard Difficult?
Yes, learning to ollie is hard at first, but only at the beginning. The movements feel strange. The timing is tricky. You’re popping the board, sliding your foot, jumping, and trying to stay balanced all at the same time.
It’s normal to mess up in the beginning. I still remember my first week trying to learn it. I kept popping the board but forgot to slide my front foot. The board just slapped the ground while I floated awkwardly in the air. It felt frustrating, like I’d never get it. But something told me to keep going. One morning, out of nowhere, I popped and slid at the same time. The board lifted with me. I landed it. Not clean, but it was real. That moment changed everything.
Most beginners struggle with the same stuff. Not jumping high enough and forgetting to slide the front foot. Leaning too far forward or back. Landing with the board tilted or shooting out. That’s all part of it.
But here’s the truth: once it clicks, it sticks. Your body starts to remember. Your balance improves. The motion becomes smooth. And suddenly, the ollie doesn’t feel impossible anymore. You don’t need to be super athletic. You just need patience and practice. Keep at it. The payoff is worth it.
How to Ollie on a Skateboard Correctly? Just 5 Simple Steps
To do an ollie correctly, you need to combine a sharp pop, a quick foot slide, and a solid jump all at the same time. It sounds like a lot, but once you break it into steps, it becomes much easier to understand and practice.
Step One: Get Your Foot Placement Right
Start by placing your back foot on the tail. Use the ball of your foot and rest it right on the curve. Your front foot should go just behind the front bolts, angled slightly. It should feel balanced and natural, not too close together, not too far apart. This setup helps you stay steady and ready to pop.
Step Two: Crouch and Pop the Tail
Bend your knees like you’re getting ready to leap. Then press down hard with your back foot to pop the tail against the ground. This quick, snapping motion sends the board upward. The harder and faster you pop, the more lift you get. Imagine snapping a mousetrap with your foot; that’s the kind of energy you want.
Step Three: Slide Your Front Foot Up
As the board begins to rise, quickly slide the side of your front foot up toward the nose. Use the grip of your shoe to drag the board upward. This is what helps level the board in the air. Don’t slide with the sole of your shoe. Use the edge, and make sure the slide is fast and forceful.
Step Four: Jump and Tuck
While you pop and slide, jump upward with both feet. Stay centered over your board. This part takes coordination, but once your body syncs up, it becomes smooth. Jump high, tuck your knees, and keep your eyes forward. The more lift you get, the more airtime you’ll feel.
Step Five: Land Smooth and Steady
As the board levels out under you, get ready to land. Keep your knees bent to absorb the impact. Try to land on all four wheels. Look ahead, not down, so you stay balanced. A clean landing feels amazing. It means you did everything right.
Learning to ollie is all about timing and repetition. Don’t worry if it takes time. Every skater has been where you are now. Keep practicing, and each part will start to feel natural.
How Long Does It Take to Learn Ollie?
Most beginners can learn to ollie in about 2 to 4 weeks with regular practice. But it really depends on how often you skate and how comfortable you are on your board.
In the first few days, you’re just figuring things out. Your feet feel awkward. The timing feels off. You might pop the board but forget to jump. Or slide your foot and nothing happens. That’s all part of the process.
By the end of the first week, you might get a few tiny hops. The board will barely lift off the ground, but it’s a win. In week two, things start to come together. Your timing improves. You start getting taller. By the third or fourth week, you could be landing ollies a few inches off the ground with better control.
One of my neighbor’s sons Jake, picked up skating last summer. He was 16 and had never been on a board before. I remember him practicing in his driveway every evening after dinner. At first, it looked like he was just stomping the board. For days, he couldn’t get it to move. But he kept at it. Every day, 15 to 20 minutes. By the third week, I saw him land a clean ollie off a crack in the pavement. He shouted, laughed, and immediately tried it again. Now he’s ollieing over curbs like it’s nothing.
Some people get it quicker. Others take longer. That’s okay. What matters is that you keep showing up. Even 15 minutes a day makes a huge difference. Consistency builds muscle memory. And once the motion clicks, it stays with you.
Why Can’t I Ollie on My Skateboard Yet?
If you’re struggling to ollie, you’re not alone. Almost every skater hits a wall early on. The ollie is tricky because it blends timing, balance, and confidence. When just one part is off, the whole trick falls apart.
You’re Not Sliding Your Front Foot Enough
This is the most common issue. The pop might be strong, but if your front foot isn’t sliding up, the board won’t rise. The slide creates the lift. Without it, your board stays stuck to the ground. I remember my cousin Alex had this exact problem. He popped like a pro, but the board wouldn’t move. One day, he exaggerated the slide, and the board finally lifted. That tiny adjustment made all the difference.
You’re Leaning Too Far Back or Forward
Balance is everything. If you lean too far back, the board will shoot out in front of you. If you lean too far forward, you’ll fall or the board will kick back. The fix is simple but takes practice. Keep your shoulders centered over the bolts. Stay relaxed and look ahead, not down at your feet.
You’re Jumping Off Instead of With the Board
Fear is natural. If you’re scared of falling, you’ll bail mid-jump. That’s when the board stays behind or flips out. You have to commit to jumping with the board. One way to build confidence is to practice on grass or carpet. The board won’t roll away, and you’ll feel more in control.
You’re Not Popping Hard Enough
A soft pop won’t get you anywhere. The tail needs to hit the ground with force to lift the board. Think of it like stomping through the pavement. The sharper the pop, the more lift you get. Some skaters underestimate this, especially early on. But the pop is the spark that starts the trick.
Still Unsure? Record Yourself
Sometimes you can’t feel what’s going wrong until you see it. Recording yourself helps you spot problems with foot placement, timing, or posture. It might feel awkward, but it can fast-track your progress.
Remember, every skater has been through this. The ollie takes time. Stay patient, keep practicing, and celebrate small wins. You’re getting closer than you think.
How to Ollie on a Finger Skateboard
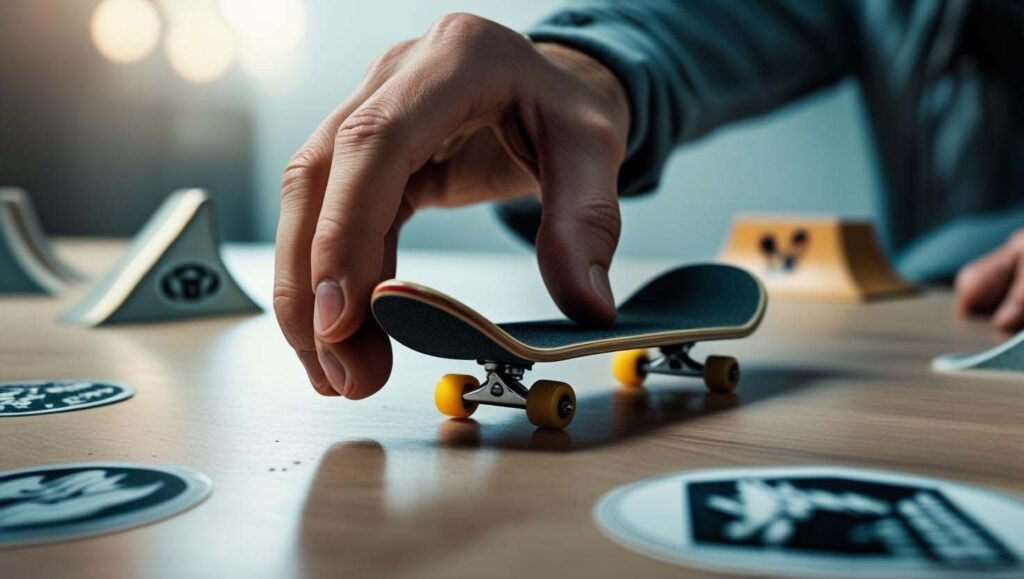
The Basics of the Fingerboard Ollie
To ollie on a finger skateboard, you need to pop the tail and slide your fingers forward, just like a real ollie, but in miniature. The motion is the same, only you use your fingers instead of your feet.
Finger Placement
Place your middle finger on the tail of the board and your index finger near the middle. This setup gives you control and balance to perform the trick smoothly.
Popping and Sliding
Press down quickly with your middle finger to pop the tail. At the same time, slide your index finger forward toward the nose of the board. This sliding motion lifts the board into the air, mimicking the real ollie motion.
Why Fingerboarding Helps
Practicing ollies on a fingerboard sharpens your timing and helps you visualize the trick’s mechanics. A friend of mine practiced fingerboard ollies all the time. When we started skating, his timing was already better than most of ours because he had a clear mental image of how the ollie works.
What Fingerboards Can’t Do
Fingerboards won’t build your leg strength or balance, so they can’t replace real practice on a skateboard. But they’re a fun and useful tool to keep your mind on the trick, especially when you can’t be out skating.
How to Ride a Skateboard
Getting comfortable riding your skateboard is the first step before trying any tricks like ollies. Riding well takes practice, and if you’re shaky or unbalanced, tricks will feel much harder than they need to be.
Before you start trying ollies, focus on pushing yourself confidently, turning smoothly, and stopping safely. Balancing both while standing still and rolling is essential. If your stance feels wobbly, trying tricks too soon can just lead to frustration.
My friend Mia, when she first started skating. She was so excited to land her first ollie that she skipped practicing the basics. She kept falling because she hadn’t quite mastered her balance or turning yet. After a few weeks of just riding, pushing, and turning comfortably, everything clicked. Suddenly, ollies didn’t seem impossible anymore.
A great way to begin is by practicing ollies while standing still. This helps you get the pop and slide right without worrying about movement. Once you feel confident, try ollies while rolling slowly. Taking it step by step builds your control and makes learning much more natural and fun.
Common Beginner Ollie Mistakes and How to Fix Them
Mistake 1: Only the Tail Leaves the Ground
The most common mistake is when only the tail of the board leaves the ground. This happens because you pop the tail but don’t slide your front foot properly. The slide is what pulls the board up and levels it in the air. Focusing on dragging your front foot up the board will help fix this.
Mistake 2: The Board Turns Sideways
Another frequent problem is the board turning sideways mid-air. This usually happens when your shoulders twist during the jump. To avoid this, keep your shoulders square and face forward. Looking straight ahead instead of down helps you stay balanced.
Mistake 3: You Land With the Board Crooked
Landing with the board crooked is a big challenge for beginners. It often comes from uneven foot placement or not bending your knees when you land. Make sure your feet are set correctly on the board and land with your knees bent and your body centered to keep control.
Mistake 4: You Can’t Get Any Height
Many new skaters struggle to get any height on their ollies. This usually means the pop is weak or the jump isn’t committed. To fix this, pop the tail harder and jump with full intention. Committing to the movement makes all the difference.
I remember when my friend Jake was learning ollies. He kept landing with the board tilted because he didn’t realize how important foot placement was. Once he adjusted where his feet rested and focused on popping harder, his ollies started to look way cleaner. Mistakes are just part of the process; each one teaches you something new.
Bonus Tips for Learning Ollies on a Skateboard
Choose a smooth, steady surface like a driveway or a clean sidewalk to practice on. It makes the movement easier and helps build confidence. One thing that helped my friend Leo was filming himself from the side and the front. Watching the videos showed him what he was doing right and what needed work.
Skating with friends or following beginner tutorials online can make learning more fun and less frustrating. You get encouragement and new ideas from others who are going through the same thing. Most importantly, be patient with yourself. Progress often comes in little bursts, not all at once.
Final Thoughts
The moment you land your first ollie is one you’ll never forget. It’s when your board finally lifts off the ground and you land with all four wheels under you. It might not be perfect. It could be just a tiny hop. But it means you’re making progress.
Learning to skateboard ollie is a journey. You’ll have scraped knees, awkward landings, and small wins along the way. Every mistake teaches you something new. Once you land your ollie, a whole new world of tricks and possibilities opens up.
So be patient with yourself. Keep practicing, even when it feels tough. Don’t give up. The streets, parks, and curbs are waiting for you to roll and fly.
FAQs About Learning to Ollie
Is an ollie the first trick I should learn?
Yes! It’s the foundation of street skating. Mastering the ollie unlocks most other tricks.
Do I need special shoes to ollie?
You don’t need skate shoes, but they help a lot. Look for flat soles for better board feel, grippy rubber to help with slides, and reinforced sides to handle wear. Brands like Vans, Nike SB, and Adidas make great skateboarding shoes.
Should I practice on grass or carpet?
Yes. Practicing on soft ground keeps your board from rolling and helps you focus on footwork. Start on grass or carpet to build confidence, then move to pavement to apply what you’ve learned in real skating.
Can I ollie while moving?
Eventually, yes. You’ll need to ollie while moving to clear curbs or gaps. But it’s best to start stationary. Focus on your foot motion and timing first. Once you’re confident, try ollies while rolling slowly.
How to ollie a skateboard?
Start with good foot placement, then practice popping the tail and sliding your front foot up the board. Work on jumping straight up and landing balanced. Break it down into small steps and practice daily. It takes time, but it keeps getting easier.